- Processore da 1 gigahertz (GHz) o più veloce o a 64 bit (x64)
- 2 gigabyte (GB) di RAM
- 60 GB di spazio disponibile su disco rigido
- Dispositivo grafico DirectX 9 con driver WDDM 1.0 o superiore
Verificare la presenza di una connessione Internet stabile durante l'installazione. Seguire i seguenti passaggi per un'attivazione corretta
Se si dispone già di una versione (installata) di Windows Server 2019 Standard come download o su USB/DVD, provare prima ad attivare questa versione con il nostro codice prodotto. Assicuratevi che la vostra versione di Windows corrisponda alla versione di Windows del codice prodotto. In caso contrario, o se l'installazione non funziona, proseguire con il punto 2.
Download la vostra versione di Windows Server dal seguente link:
| LINGUA | 64 BIT |
| DEUTSCH | Herunterladen |
| INGLESE | Download |
| FRANÇAIS | Télécharger |
| ITALIANO | Scarica |
| ESPAÑOL | Descarga |
Il file ISO è la versione per l'installazione permanente su un PC.
Dopo il download, masterizzare il file ISO su DVD o salvarlo su USB. Una volta avviato il PC / Laptop con il DVD / Pendrive, verrà eseguito il programma di installazione. Seguire i passi guidati del programma per completare l'installazione.
Questa installazione Microsoft include una versione di prova di 180 giorni.
Per passare alla versione completa, eseguire i seguenti comandi:
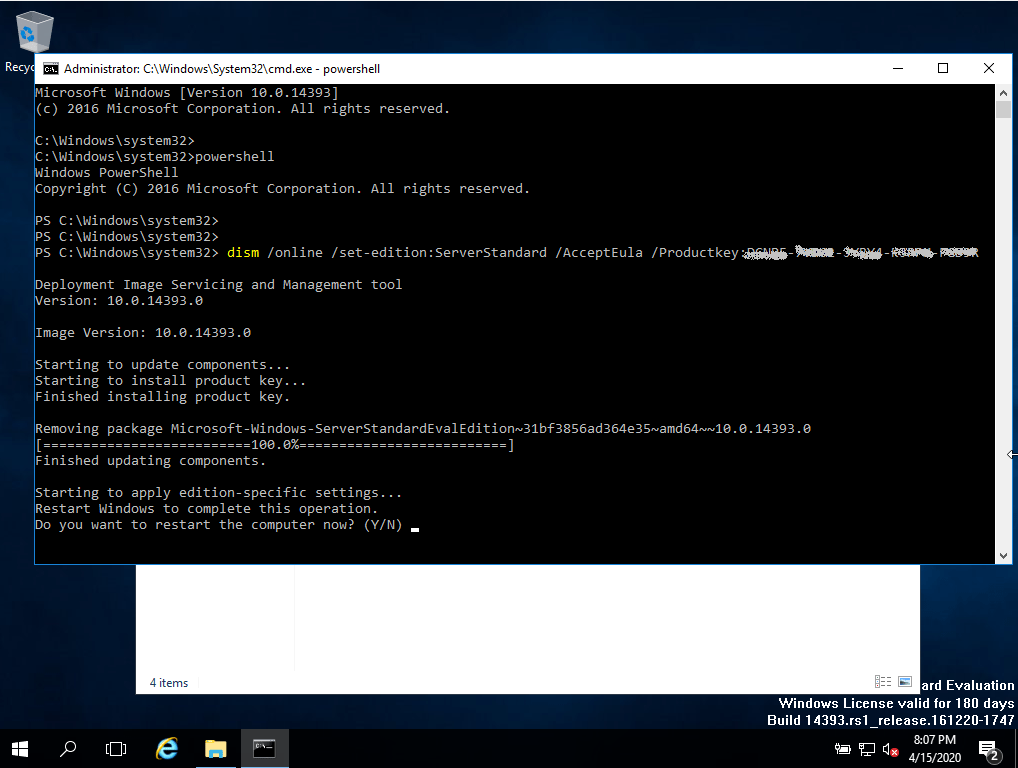
- Aprire Powersell come amministratore.
- Nella console, immettere il seguente comando:
DISM /Online /Set-Edition:ServerStandard /ProductKey:XXXXX-XXXXX-XXXXX-XXXXX /AcceptEULA
(Inizialmente si utilizza una chiave generica per la versione di prova, in seguito si attiverà la versione completa). - Verrà richiesto di riavviare il computer.
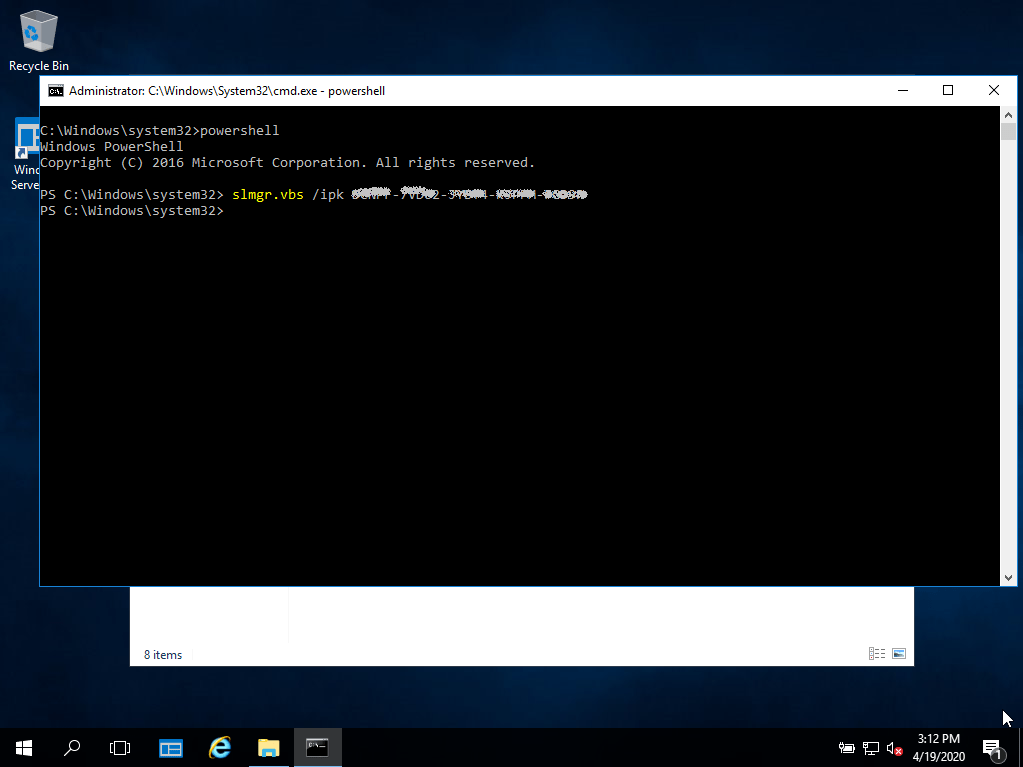
- Una volta riavviato, aprire Powershell come amministratore ed eseguire i seguenti comandi:
slmgr -ipk XXXXX-XXXXX-XXXXX-XXXXX-XXXXX
(Sostituire le "X" con il codice prodotto acquistato)slmgr -ato
- L'attivazione avrà successo.