- Procesador de 1 gigahercio (GHz) o más rápido o de 64 bits (x64)
- 2 gigabytes (GB) de RAM
- 60 GB de espacio disponible en el disco duro
- Dispositivo gráfico DirectX 9 con controlador WDDM 1.0 o superior
Compruebe que dispone de una conexión a Internet estable durante la instalación. Siga estos pasos para una activación exitosa
Si ya tiene una versión (instalada) de Windows Server 2019 Standard como descarga o en USB / DVD, primero intente activar esta versión con nuestra clave de producto. Asegúrese de que su versión de Windows coincide con la versión de Windows de la clave de producto. De lo contrario, o en caso de que la instalación no funcione, continúe con el punto 2.
Download su versión de Windows Server desde el siguiente enlace:
| LENGUAJE | 64 BITS |
| DEUTSCH | Herunterladen |
| INGLÉS | Download |
| FRANÇAIS | Télécharger |
| ITALIANO | Scarica |
| ESPAÑOL | Descarga |
El archivo ISO es la versión para una instalación permanente en un PC
Tras la descarga, grabe el archivo ISO en un DVD o guárdelo en un USB. Una vez que arranque su PC / portátil con el DVD / Pendrive se ejecutará el programa de instalación. Siga los pasos guiados del programa para completar su instalación.
Esta instalación suministrada por Microsoft incluye una versión de prueba de 180 días.
Para convertir a una versión completa, ejecute los siguientes comandos:
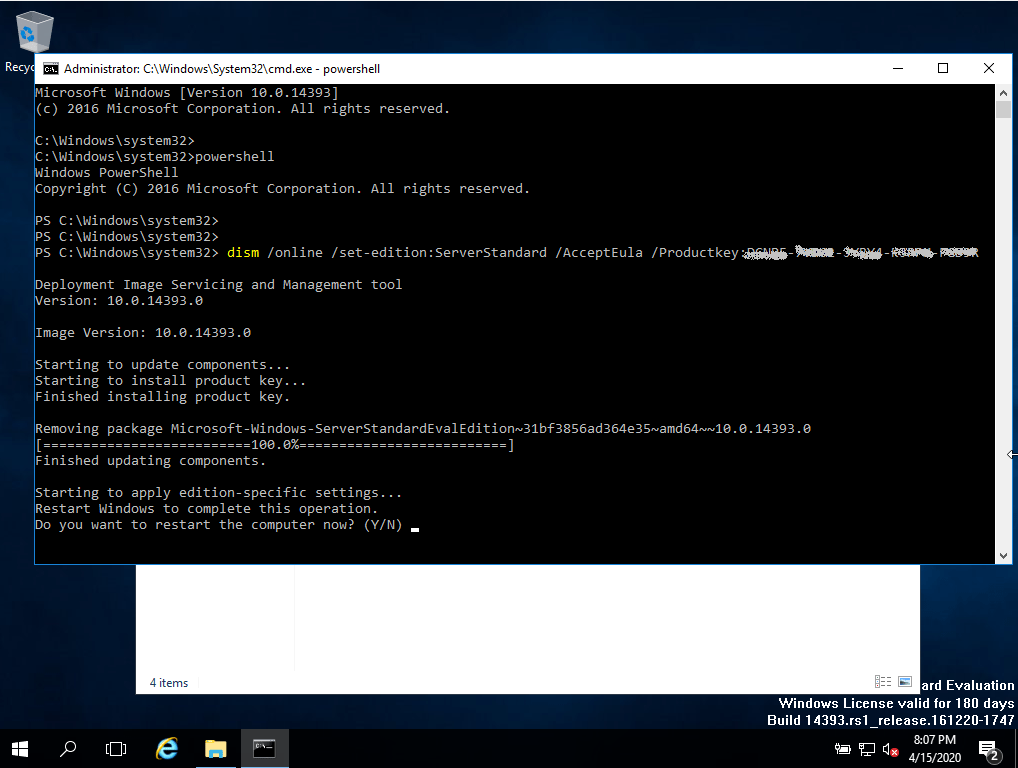
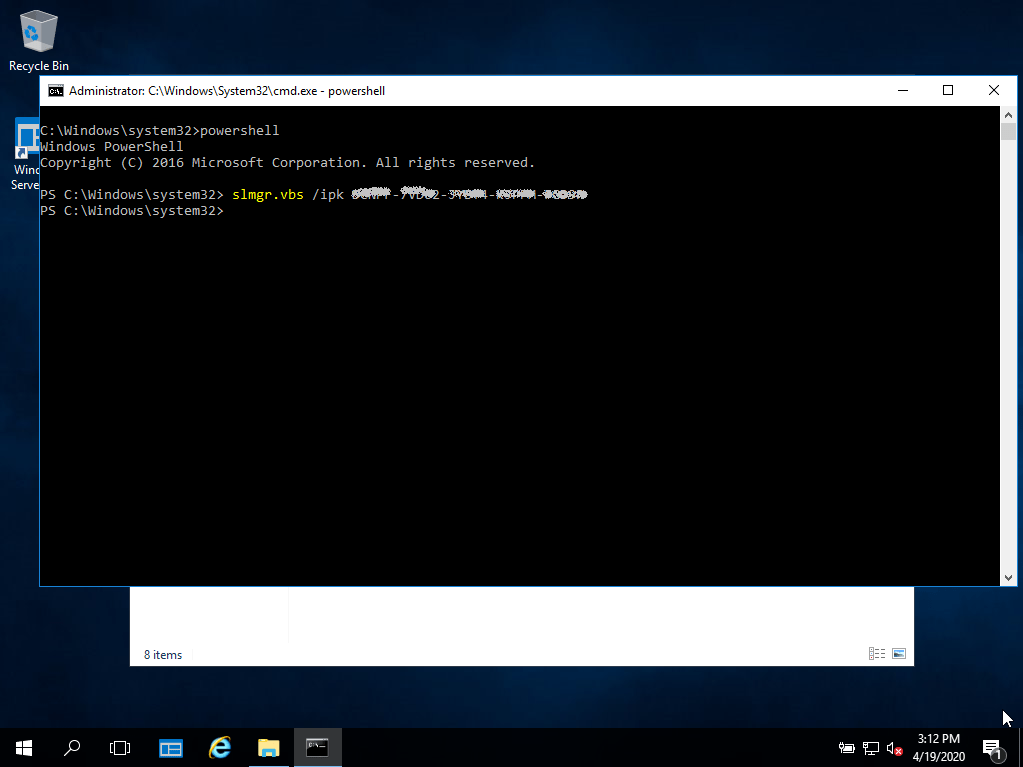
- Abra Powersell como administrador.
- En la consola, introduzca el siguiente comando:
DISM /Online /Set-Edition:ServerStandard /ProductKey:XXXXX-XXXXX-XXXXX-XXXXX-XXXXX /AcceptEULA
(Inicialmente, utilizamos una clave genérica para la versión de prueba, más tarde activaremos la versión completa) - Le pedirá que reinicie su ordenador.
- Una vez reiniciado, abra Powershell como administrador y ejecute los siguientes comandos:
slmgr -ipk XXXXX-XXXXX-XXXXX-XXXXX-XXXXX
(Sustituya las "X" por la clave del producto que ha adquirido)slmgr -ato
- La activación será exitosa.